
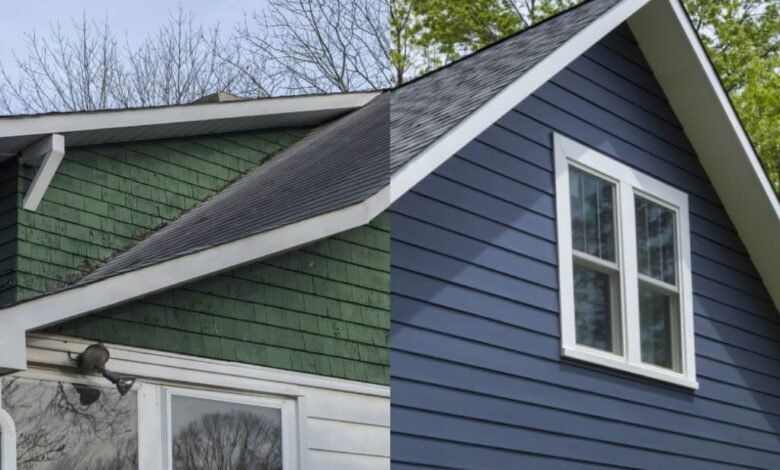
Homes of advanced years require special consideration. Wall assemblies from decades past were designed with different criteria in mind and commonly feature no drainage plane, little to no continuous insulation and siding that has weathered for decades. So while replacing the siding of an older home can be a cosmetic exercise, it can also be the only time that a home of advanced years has its walls fully exposed, allowing for consideration of options to improve management of water as well as the thermal performance of the home, options that will affect the home’s maintenance for years to come.
What tearing off the old cladding actually reveals
A re-side can also offer substantial value before any new siding is installed. Removing the old siding allows a complete inspection of the wall sheathing, framing, as well as any exterior wall flashing. Often significant water damage is found to have occurred behind the old siding prior to its failure. A mid-century home, for example, is frequently found to have been built with board sheathing that has developed numerous gaps between the boards, aged felt paper that has failed between the laps of the felt paper installed over the sheathing, and in many cases, no weather-resistive barrier has ever been installed.
Correcting the details that caused the original failure
Don’t overlook checking the conditions around windows and doors during the removal process. In many cases considerable rot will have developed around the head and sills of the windows and around the band joist, and even more seriously around the roof-to-wall junction. In most cases remedying these problems as part of the re-side process will be far less expensive than as a subsequent and completely separate task.
- Probe sheathing at all penetrations and low points before quoting the job
- Document existing conditions photographically, since older homes frequently hide more than one previous repair
- Confirm whether the original cladding contains asbestos or lead-based coatings, which changes removal cost and scheduling
Where real thermal gains come from
Studs, plates and joist headers all cut through the cavity in older walls to create thermal bridges through the structural framing. They can significantly reduce the R-value of the wall even below the bare minimum stipulated by the nominal rating of the insulation. Continuous exterior insulation added to the exterior of the framing during a re-side of the walls offers an effective means to address these thermal bridges rather than adding more depth of insulation in the cavity.
Choosing a thickness the wall can carry
Half an inch of foam, as a minimum, can serve as a thermal break and enhance the drainage of water behind the siding. However, it can also generate significant value in a reduction of heating energy if increased in thickness to one to two inches of foam. Extra foam requires longer fasteners, possible furring, and extension jambs at openings, however. See the section on drainage below for an analysis of how exterior insulation affects the sheathing in terms of moisture in cold climates and verify that the total R-value of exterior insulation plus cavity insulation is sufficient to maintain the sheathing above the dew point.
Comparing material classes on the terms that matter
When choosing a material for an older home, it is a trade-off between weight, movement, maintenance interval and how it looks in relation to original trim and massing of the house.
| Material | Typical service life | Maintenance interval | Key constraint on older homes |
| Vinyl | 25 to 40 years | Washing only | Needs flat substrate, expansion gaps critical |
| Fiber cement | 40 to 50 years | Repaint 10 to 15 years | Weight and cut dust control |
| Engineered wood | 30 years plus | Repaint 8 to 12 years | Edge sealing and ground clearance |
| Cedar | 30 to 60 years | Stain 5 to 8 years | Ongoing owner commitment |
| Aluminum | 35 years plus | Minimal | Denting, limited profile range |
Matching profile and reveal to the architecture
A 4″ reveal for wide boards will make a house look like it has been half stripped and face lifted. Look at the original lap line and shadow and match that with your choice of material and width of board. Also pay attention to corner treatment as this can often be a miter or woven corner, which will look far better than preformed posts.
Installation quality determines whether any of it works
Fail to specify proper fastening, correct panel spacing, and a proper water-management layer behind the siding material, and even the best siding products will provide only short-term benefit. Over-driven nails into fiber-cement siding, face-nailing vinyl, and failure of sealed butt-joined siding with no means for water to drain out between panels are among the most fatal of errors on exterior siding. For an older house in a freeze-thaw climate, it is worth hiring a crew that handles Toledo siding installation regularly and can show you how they detail flashing and drainage on homes of that vintage.
- Confirm the drainage gap behind the cladding, whether from furring strips or a drainable housewrap
- Verify fastener type and length against the actual sheathing found, not the assumed sheathing
- Keep cladding at least six inches above grade and two inches above roof surfaces
- Leave manufacturer-specified clearances at trim and openings for seasonal movement
Framing the return for the owner
While the cost of re-siding a house may compare unfavorably to such interior renovations as a new kitchen or bathroom, the costs must be contrasted over a 15-year period. For instance, the cost of a re-side includes the cost of repainting a house that is enclosed with new siding. Also, it is easier to correct problems found during the removal of old siding than to find and correct problems with a house that has been recently re-sided. Add to these items the energy savings that can be gained by including exterior insulation in the re-side of a house and the re-side becomes the structural maintenance that it is.